If you are drowning with so much guidance related to configuring Inbound email settings in SuiteCRM then we have the easiest steps to do this. It’s pivotal for SuiteCRM users to know how to configure it promptly.
Here we go:
- First off, Log-in into your Gmail account and click on Settings

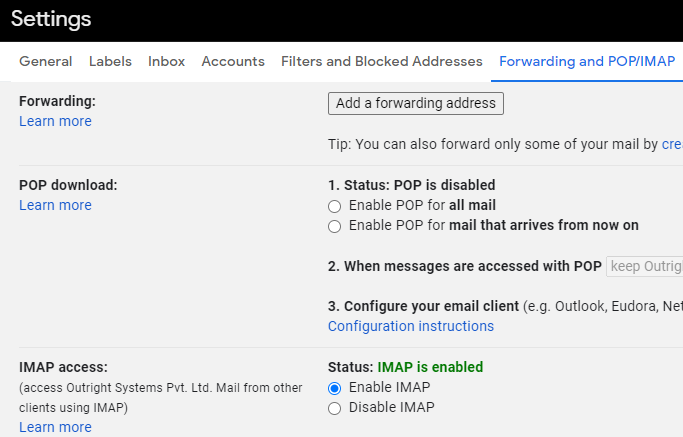
- Select “All Settings” and go to the option “Forwarding and Pop/IMAP”. You need to allow “Enable IMAP”
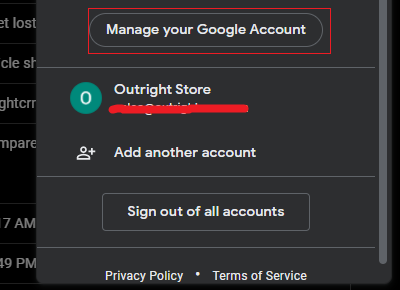
- Click on “Manage your Gmail account” now
- Your next step is to select Security and enable “2 Step verification”
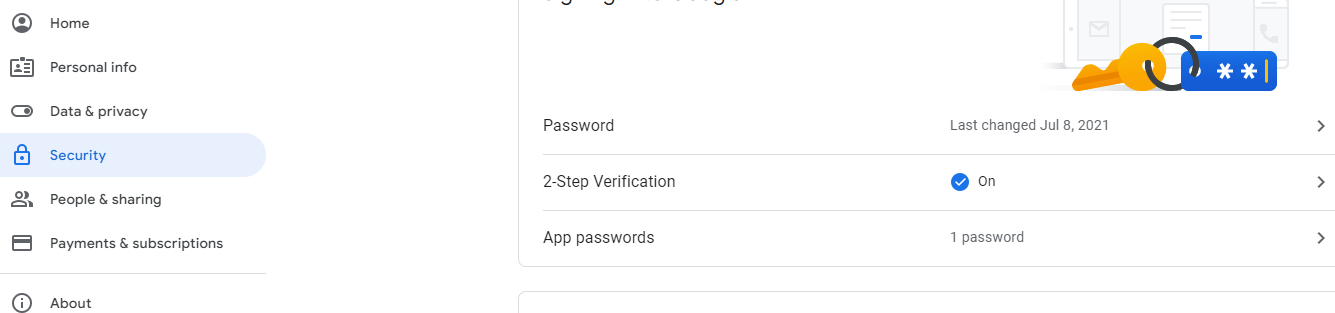
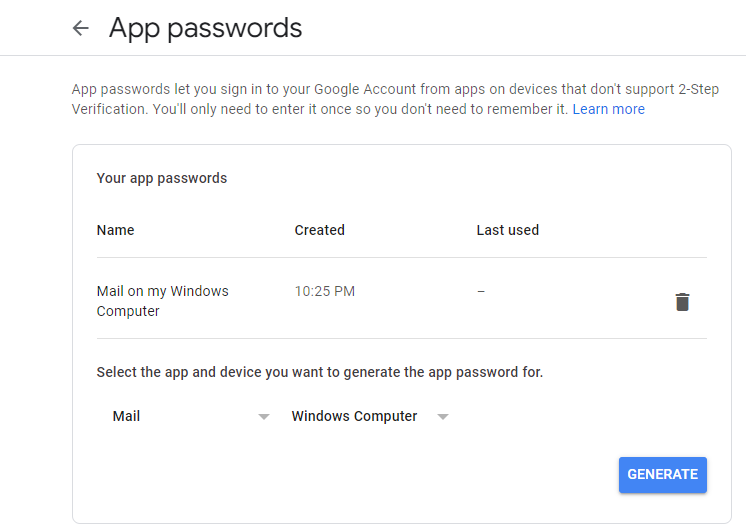
- After completing the above steps, click on the “App Password” feature. You need to select the App and Device here.
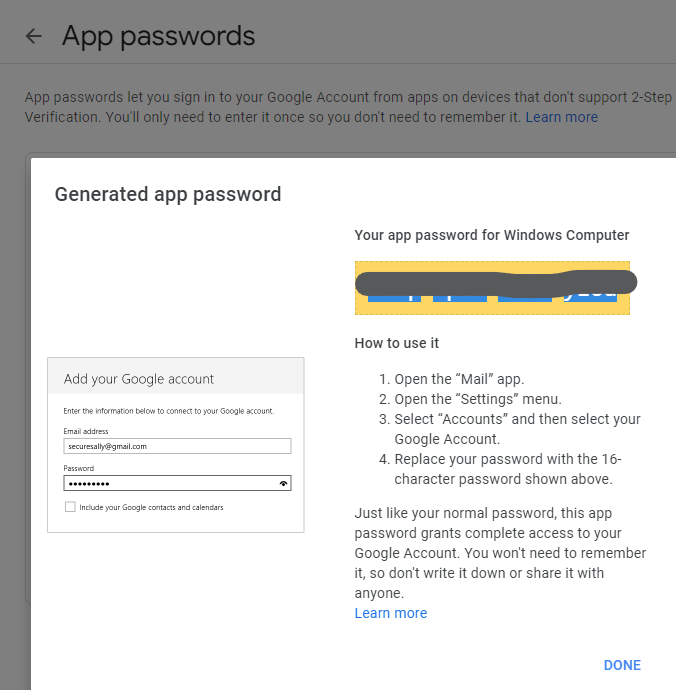
- Click on Generate and copy the App password now.
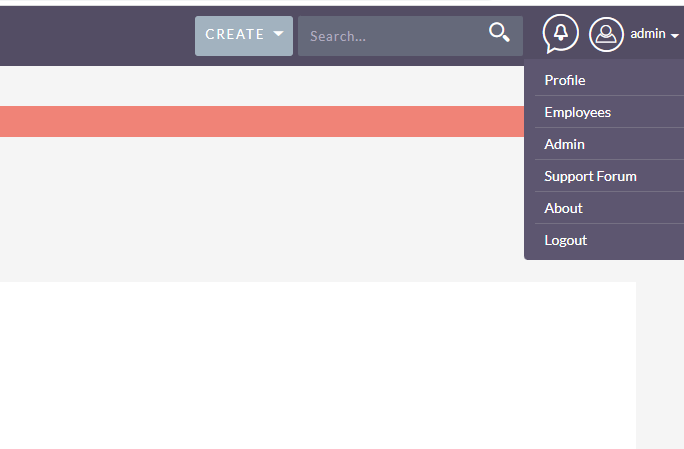
- Now just Log-in into your SuiteCRM and click on “Profile”
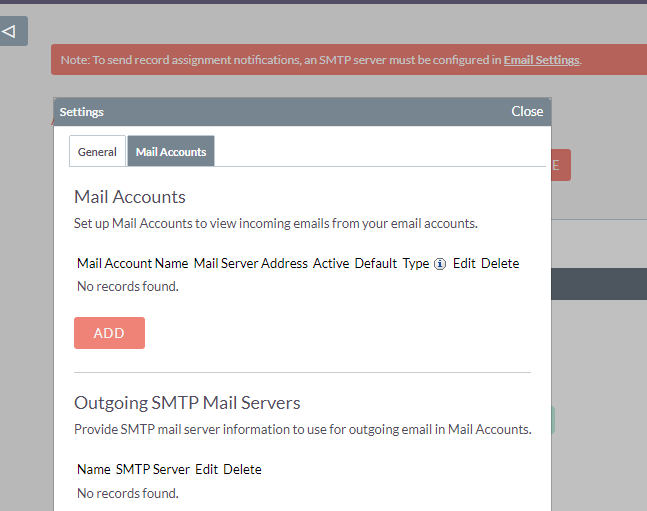
- Tap on the “Settings” option
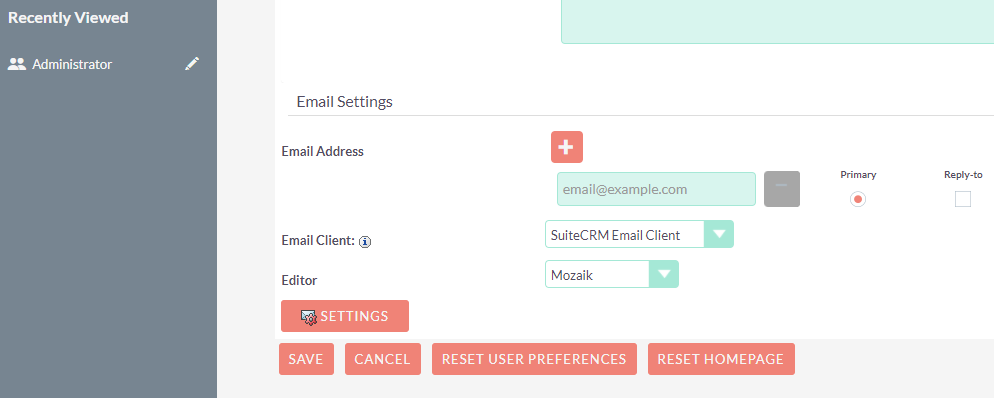
- Select the Mail Account Tab and click on “ADD”
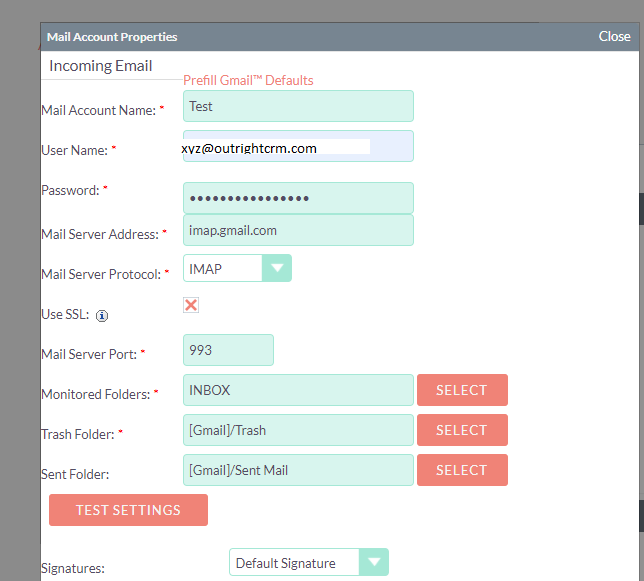
- Fill out all the Inbound email configuration form. Note: You need to enter the Password you copied from “Generate App Password”.
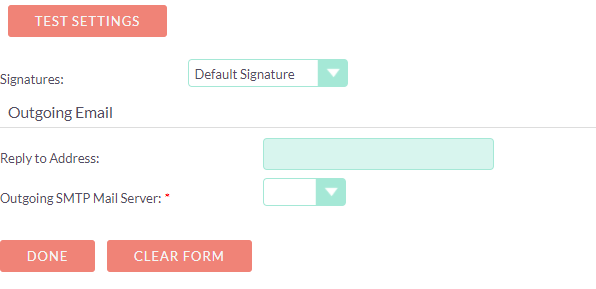
- For the verification purpose, select now “TEST SETTINGS”.
- You will get the message of a Successful connection.

- Select Done
- Go to the Emails module now to see your email.